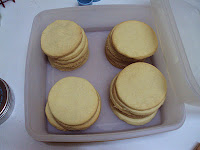
So as everyone knows, at first, you bake the cookies :). I used my basic Sugar Cookie recipe.
And if you are thinking: those round cookies, don't all look perfects ROUND. Well....I didn't have a big enough round cookie cutter, so I used a drinking glass....shhhhhhhhhhhhh.
Since I was going to bake a big batch, I also thought to myself...why not make other designs with the Sugar Cookies?? I already had a design in mind: Polka Dots. While I was planning for the Bake Sale, I also had to think of decorations that weren't going to cost me too much. That's how I came up with the Flower Cookies, too! Not only were they going to cost me less than real ones, I got to sell them and cover other expenses as well. These last two designs I decided I was going to put on sticks: Lollipop Cookies.
Ok, the cookies are baked and cooled. As you can see, they are also stored in air tight containers since it was going to take a couple of days to decorate. I needed them to be fresh for the Bake Sale. But either way, as a good rule of thumb, I always keep my cookies in air tight containers :)
One thing I didn't make, was the Royal Icing. Since I was selling these, I needed the pasteurized egg whites and I didn't know where to get them (still don't just yet). So I bought a Royal Icing in which you add just the water and the color. I needed 3 colors: Orange, Black and White. I also needed more than one consistency. So before I started to panic, I started with the first thing I would need: the thick orange.
I did the outlines on all the cookies, including the flowers and the dots. Then I thinned the consistency and flooded the cookies (with the toothpick and all!)
Following the same steps, I did the black and white on the flowers and the dots.


Of course I let each color dry before I continued with the next one. If you see one round orange cookie with black around it...that was an expiramentation. I added the black sugar while the icing was still wet to see what it would look like.. I didn't think it matched my sketch, so I didn't continue with it.
Now for the black cats...see, the problem was that I didn't have a stencil. So I made one...a paper one... which wasn't the best idea. I used spray to do the cats, and after 3 cats, I had to wait for the paper to dry. I got a few cookies smudged all over, too. Most of them came out nice, though :).
But this wasn't the end of it.. I had promised my audience black sparkles!!! So i had to add them on the cookies! So I rolled them in jam, and then in black sugar, and got what I was going for. What do you think, close enough?
I made sooooo many of these cookies. They were the last to go due to the quantity.
Here's my Halloween Dots Cookies (as I named them):
Even though I first thought of putting my Flower Cookies in a vase, then I thought people would be more likely to buy them if they were on the table in a platter, like the rest of the goodies :).


No comments:
Post a Comment