Pages

Welcome!

I want to thank you for choosing to check out my blog. I appreciate honest comments on what you think about my products. I welcome suggestions :)


Showing posts with label cookie decorating. Show all posts

Monday, February 20, 2012

The Making of: Sugar Cookies

Hi Everyone!
So here is another episode of "The Making of" for the Valentine's Bake Sale. These are my Sugar Cookies. You can never be missing some decorated cookies for ANY occasion. First off, my Chocolate Sugar Cookies.


This is what they looked like in my sketchbook:

The little grey dot on the side? It resembles a big silver non pareill :).

I was intending for the color to come out as red, but it just kept becoming more and more deep pink. But they still came out good looking ;) I also heard they tasted very good. (See now, I am on a diet, as per my New Years Resolution, so I couldn't taste EVERYTHING. These I did not. At least I'm still on my diet ;) )

Then, I did these little beauties:


What you are looking at are my Sugar Cookies with ...guess whose recipe? I actually did Sugarbelle's Chocolate Royal Icing from her blog The Sweet Adventures of Sugarbelle. I am a big fan of hers, so one day as I was browsing through her blog, I stumbled upon the recipe. I thought I'd give it a try, and it came out great!! You should try it!

I initially thought I'd do these Round, like my sketch.


But if you remember the Cat Cookies I made for Halloween, I don't own a large enough round cookie cutter. So I used what I had on hand.
The little heart is sugar paste. I thought I'd play a bit with texture and taste rather than do everything with royal icing.


I also made these cookies, but not for the Bake Sale. Well, when I said I was having a Valentine's Bake Sale, I was asked to do some extras for a conference. I thought it'd be special if the cookies were different from what I had to offer for the Bake Sale.


I improvised on these, so I don't have a sketch, either. But everyone was impressed upon delivery. Simple and nice.

I have one more Sugar Cookie I made, but that one is special, so it has to go on its own post ;)
So keep an eye out for it.

Wednesday, February 15, 2012

The Making of: Glittered Heart Cookies

Hi Everyone!! I'm back! Well I wasn't gone, I was here. I was just getting prepared for my Valentine's Bake Sale and I also have many orders coming through so I'm busy busy busy.

As I promised, I was going to do a series of "The Making of" posts for my Valentine's goodies. Let's start with the Glittered Heart Cookies. They went on here:


This is my Strawberry Cupcake with Strawberry Frosting. I use fresh strawberries, unless I cannot find them ANYWHERE. It just tastes better this way!!
I saw this picture and I LOVED it, so I wanted to make something like it for Valentine's Day.
The thing is, I couldn't find the iiiity bity plain nonpareills in only red or only pink. So I went online, searched for them, and found them in Los Angeles. (Ironic, right? I used to live there and never looked for anything like it while I was there). So I thought to myself "I can order them...if they get here on time, I can make the cookies. If not...then well I have to find something else to do with the cookies." And they came right on time ;)


I also made a sketch of what I wanted the Cupcakes to look like. I like to keep all my ideas in my sketchbook in case they need altering. Plus, they are all in one place, so I can look at them at any time, brainstorm, and add more.


After I baked some heart shaped Sugar Cookies, I outlined them with a baby pink Royal Icing. And then filled them with the Icing, too. I didn't fill them with the sprinkles until they were partly dry. I had pink and red sugar in there, too, and if I filled the cookies with the sparkly mixture I made, the sugar would've gotten wet.


I am deffinately getting better at this than my first or second time outlining and filling cookies with Royal Icing. First of all, I made sure my icing wasn't too stiff or too wet for the outlining.
And then I used the 10 second (.....right? At least that's how many seconds I waited) rule...you know, where you run your knife through the icing and wait 10 seconds until the line is gone? That one. I used it... last time I decorated cookies, I didn't even know this rule existed.


What do you think? These were my favorite, especially pared with the Strawberry Cupcake, from my Valentine's Bake Sale.
Oh, and did I tell you? I created a Facebook Page.

Sunday, December 18, 2011

Christmas Baubles

They are finally done!!! Not that they should take too long, it's just that I had to go to work between making the dough, letting it sit, making the cookies, baking the cookies, cooling the cookies, making the royal icing, coloring the royal icing, filling the cookies, decorating the cookies, making mistakes, fixing mistakes, and eating a cookie here and there!


The base for these is gingerbread, so I had to let it sit for a few hours in the fridge. I made four different bauble sizes and some round ones. The packet of cookie cutters I bought also had a mini round cutter to cut out holes so you can actually hang these if you wanted to. They came out very tasty.


After these were completely cool, I started flooding them. I got the idea of the colors from Peggy Porschen's Book Simply Spectacular Cakes.


(Don't mind the gingerbread people on the top right. They are for that other movie we talked about, "Gingerbread House").

After these were completely done and dried, I started adding the details and embellishments.


They all have ribbons, too, in case someone wants to really put them on their tree. I did that once, when my goddaughter was little, only it was with chocolates. We just saw the whole tree fall and she was under there, still holding on to the chocolate ornament!

Sunday, November 6, 2011

The Making of: Cat Cookies

I had an image in mind when I drew the sketch for these. They came out almost as I imagined them. See, my little secret is that I've only read about cookie decorating, but I had never tried it myself before the day I made these cookies...or had even seen anyone actually do it in front of me. Just pictures in books...and blogs. So I had to opt for something easy and somewhat quick-finishing. I had tons of things to bake for the Bake Sale so I wanted to make sure I had enough time for everything else.

So as everyone knows, at first, you bake the cookies :). I used my basic Sugar Cookie recipe.
And if you are thinking: those round cookies, don't all look perfects ROUND. Well....I didn't have a big enough round cookie cutter, so I used a drinking glass....shhhhhhhhhhhhh.


Since I was going to bake a big batch, I also thought to myself...why not make other designs with the Sugar Cookies?? I already had a design in mind: Polka Dots. While I was planning for the Bake Sale, I also had to think of decorations that weren't going to cost me too much. That's how I came up with the Flower Cookies, too! Not only were they going to cost me less than real ones, I got to sell them and cover other expenses as well. These last two designs I decided I was going to put on sticks: Lollipop Cookies.


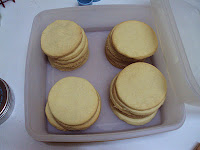
Ok, the cookies are baked and cooled. As you can see, they are also stored in air tight containers since it was going to take a couple of days to decorate. I needed them to be fresh for the Bake Sale. But either way, as a good rule of thumb, I always keep my cookies in air tight containers :)

One thing I didn't make, was the Royal Icing. Since I was selling these, I needed the pasteurized egg whites and I didn't know where to get them (still don't just yet). So I bought a Royal Icing in which you add just the water and the color. I needed 3 colors: Orange, Black and White. I also needed more than one consistency. So before I started to panic, I started with the first thing I would need: the thick orange.


I did the outlines on all the cookies, including the flowers and the dots. Then I thinned the consistency and flooded the cookies (with the toothpick and all!)


Following the same steps, I did the black and white on the flowers and the dots.


Of course I let each color dry before I continued with the next one. If you see one round orange cookie with black around it...that was an expiramentation. I added the black sugar while the icing was still wet to see what it would look like.. I didn't think it matched my sketch, so I didn't continue with it.

Now for the black cats...see, the problem was that I didn't have a stencil. So I made one...a paper one... which wasn't the best idea. I used spray to do the cats, and after 3 cats, I had to wait for the paper to dry. I got a few cookies smudged all over, too. Most of them came out nice, though :).


But this wasn't the end of it.. I had promised my audience black sparkles!!! So i had to add them on the cookies! So I rolled them in jam, and then in black sugar, and got what I was going for. What do you think, close enough?

I made sooooo many of these cookies. They were the last to go due to the quantity.

Here's my Halloween Dots Cookies (as I named them):
Even though I first thought of putting my Flower Cookies in a vase, then I thought people would be more likely to buy them if they were on the table in a platter, like the rest of the goodies :).